Tip: You can achieve a similar business card identification effect with Ragic AI's "Automatically Add Data from Uploaded Files" feature. If you prefer to adjust and set up the process yourself, or if you want to learn and test how to build workflows in n8n, you can follow the method in this article.
Imagine you've finished a day of fieldwork and gained some clients— and now you have a stack of business cards in your hand. To ensure data integrity, every single card needs to be filed into the database... At this point, you’ve probably realized that manually matching and entering every piece of information from a whole pile of business cards into a database is incredibly tedious and inefficient.
This is where AI can become a big help!
For example, your business card might look like this:

Another business card might look like this:

You can simply hand over these cards to AI, and it will automatically analyze the content and enter the data into your Ragic sheet for you.
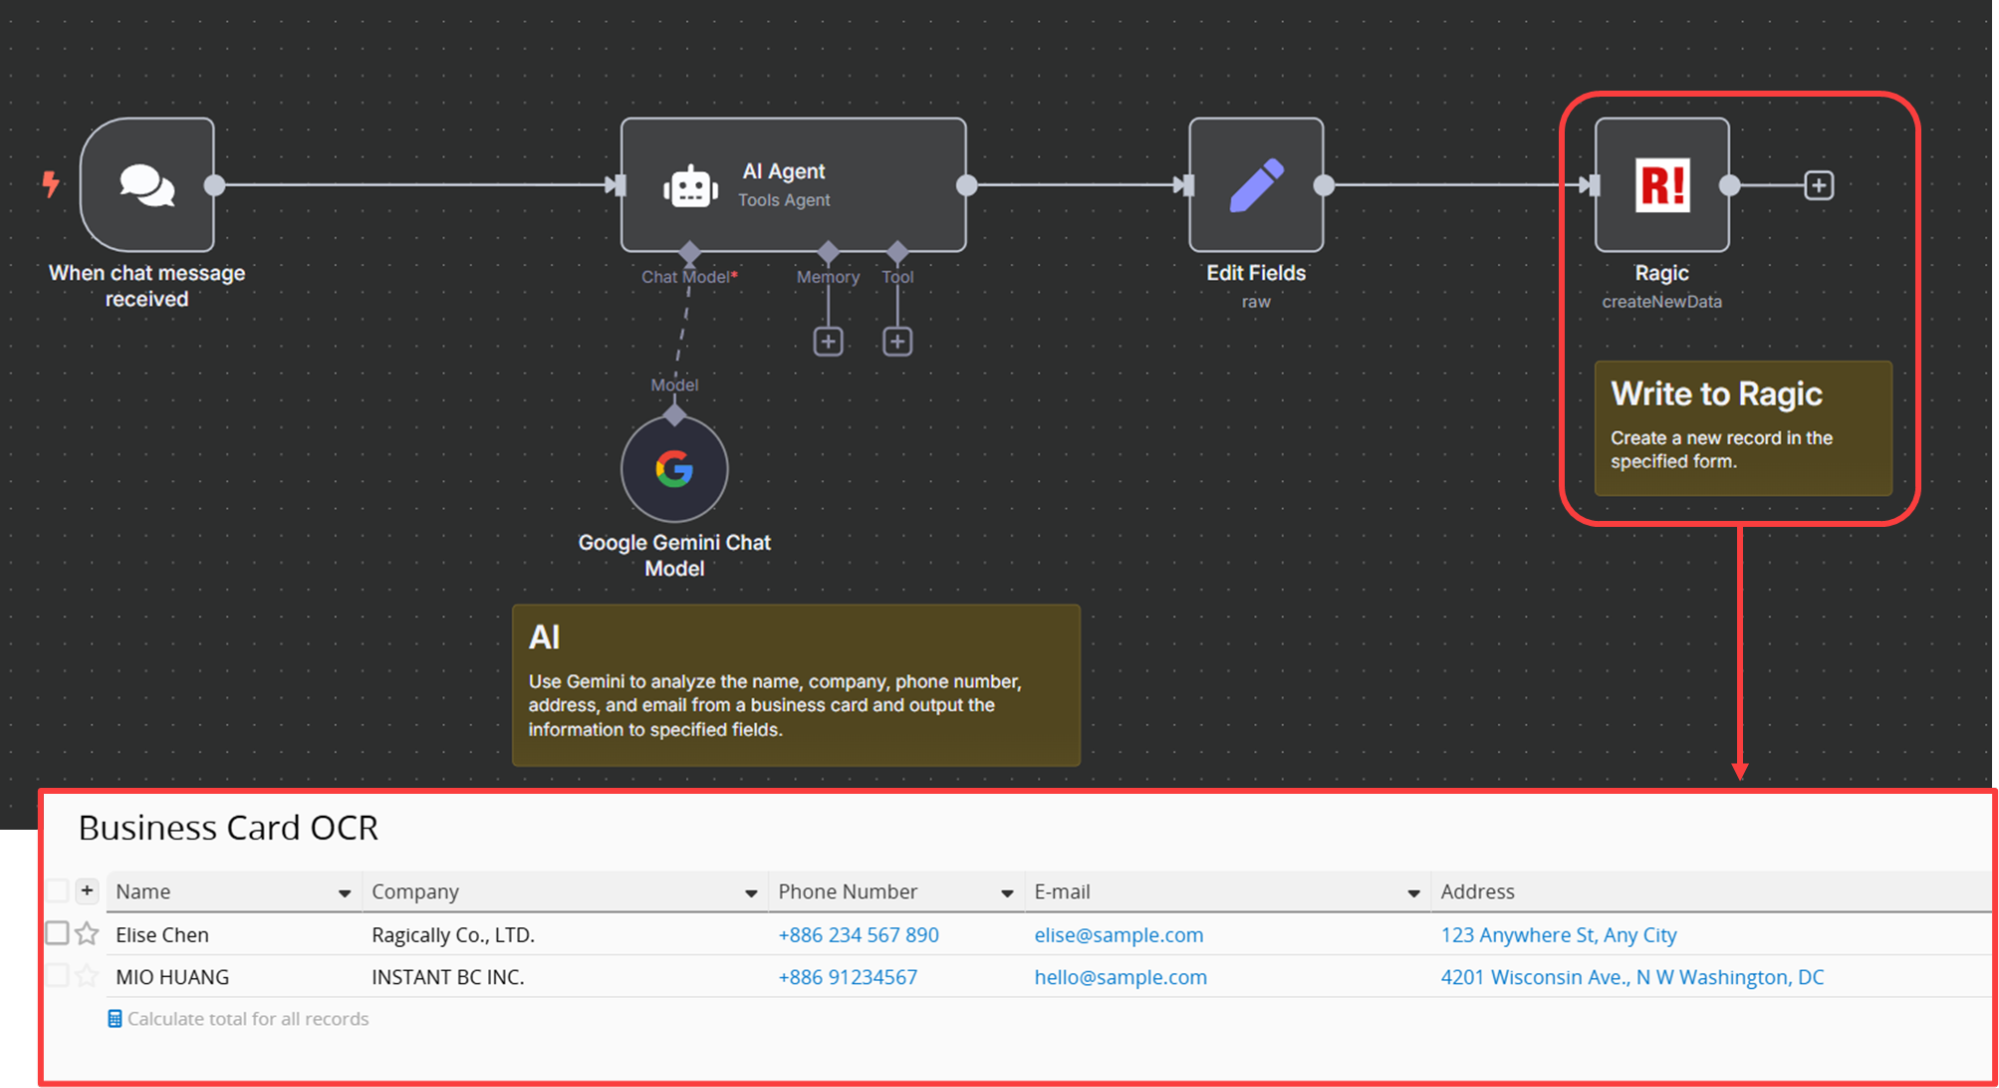
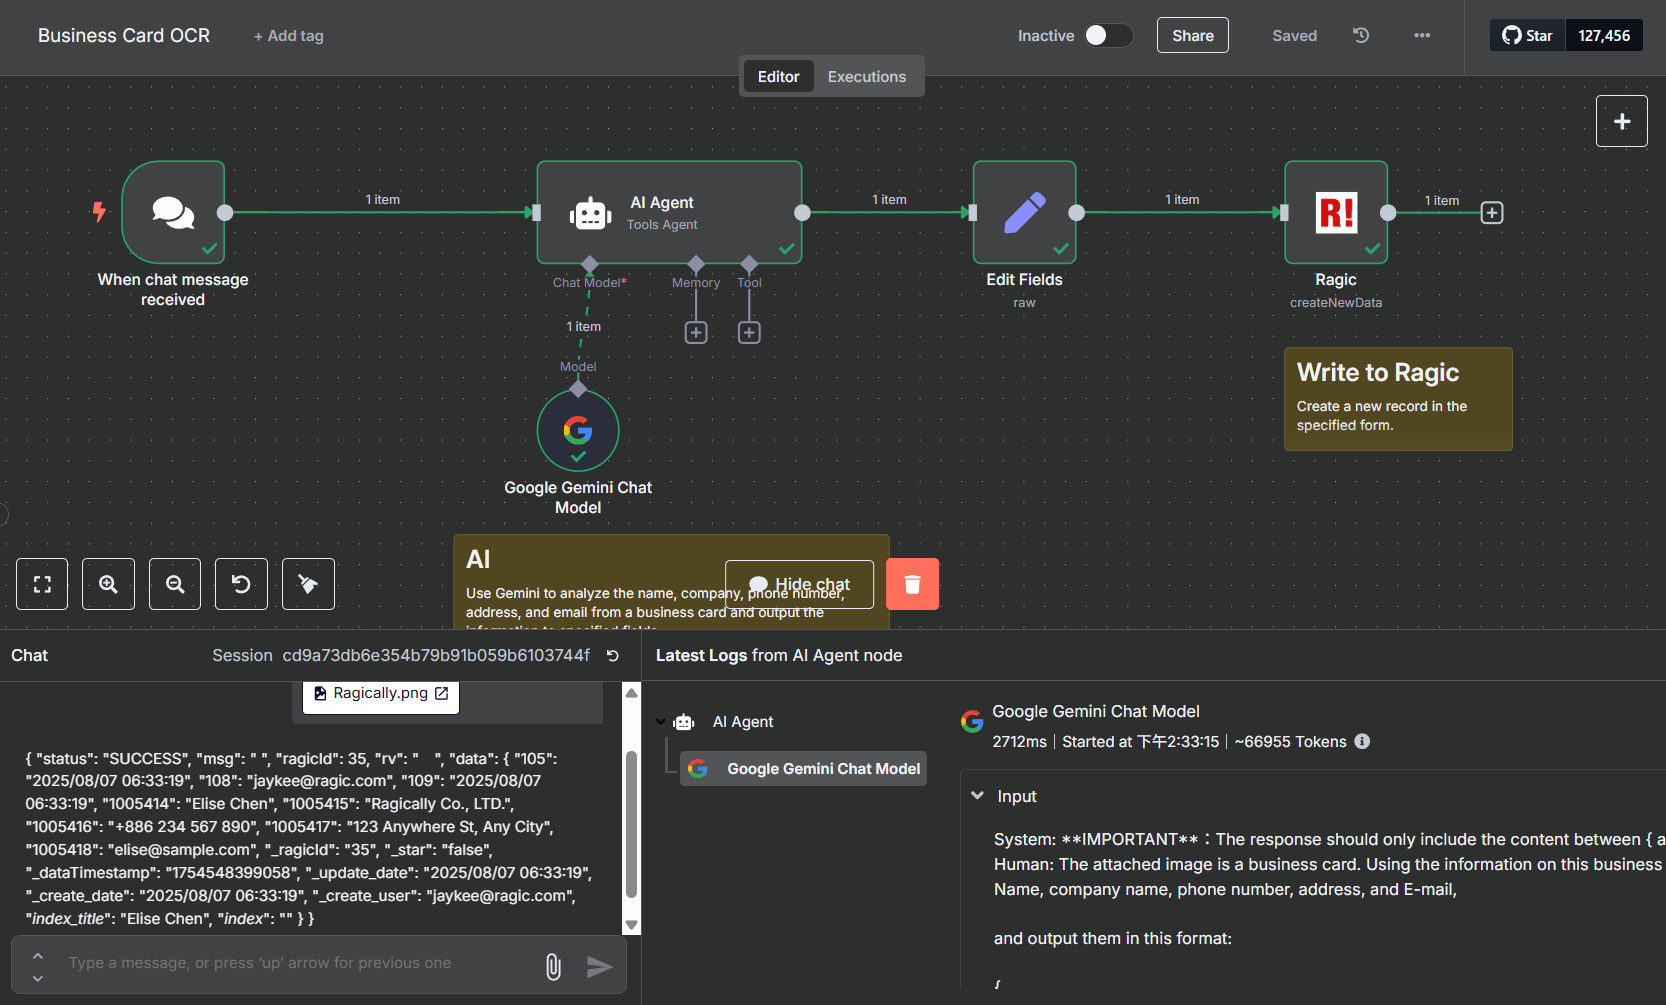
Afterwards, you just need to do a quick check for any incorrect information, and you'll have easily completed a process that would have been extremely complex and tedious otherwise. Aside from Ragic AI, you can achieve this by using n8n for integration and design an integration workflow like this:
When sending an image to the AI (Google Gemini) in n8n, the system automatically identifies the information in the image and returns it to the Ragic sheet in a specified format.
You can click here to download our pre-designed workflow. Import it into your own n8n, and then follow our subsequent steps to configure the workflow for your n8n and Ragic sheet.
Please refer to the steps here to set up a self-hosted n8n server and install the Ragic nodes we developed.
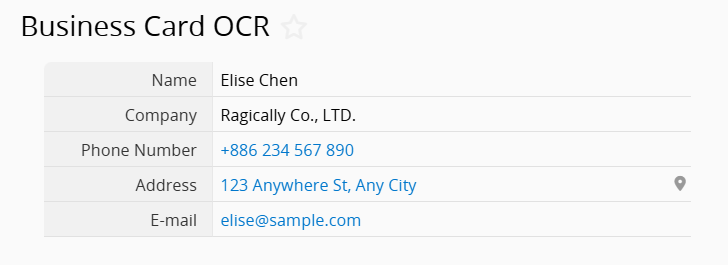
You can design your Ragic sheet according to your needs. If you want to record the information from business cards, you'll likely need to know the person's name, company name, phone number, company address, and email. Your Ragic sheet might look like this:

To allow us to send messages and files to the AI, we'll use the "On Chat Message" trigger node in n8n, along with an AI Agent, to let n8n process this information.
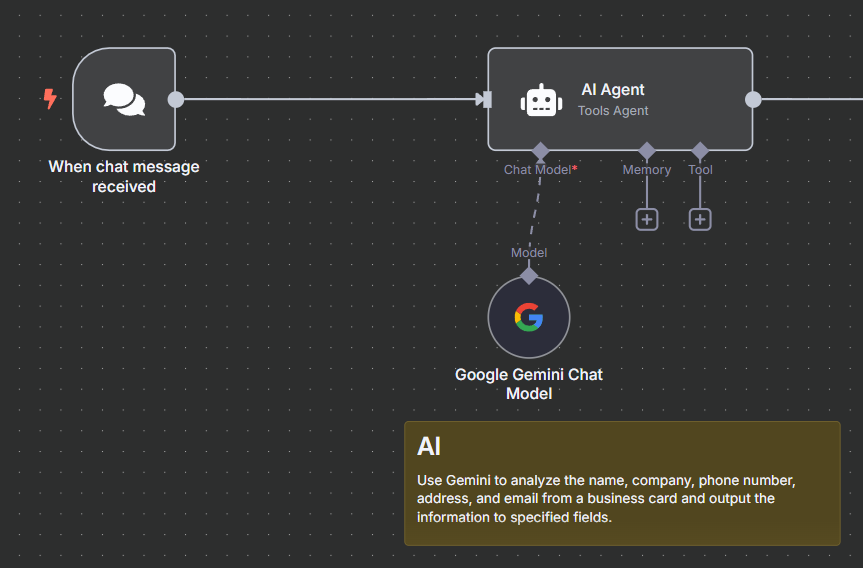
In the AI Agent, you need to select an AI model. Here, we'll use Google's Gemini. When setting up Gemini, you may need to enter Gemini's API Key into n8n to link to your account. Please click here and press "Create API Key" in the top right corner to obtain your API Key.
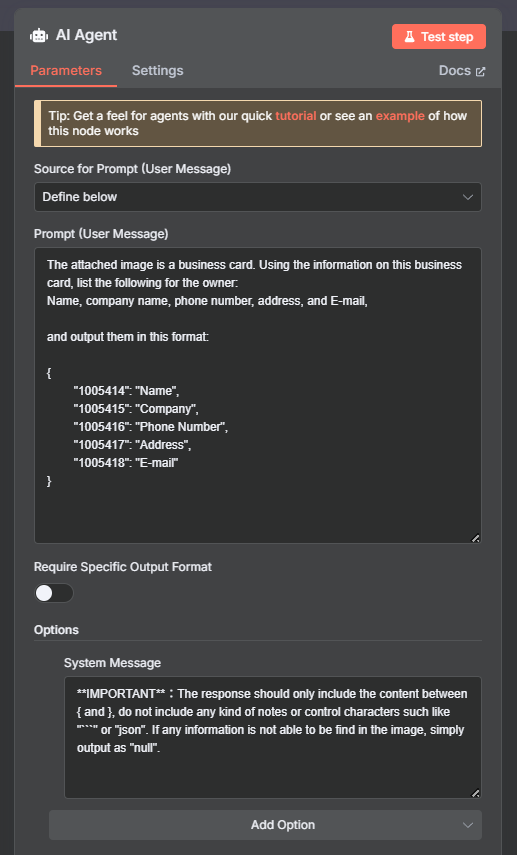
After connecting the AI, you can set up the AI's Prompt and adjust its behavior. We recommend using the following prompt as a base and then adding or removing the information you want the AI to detect and record, based on your needs:
The attached image is a business card. Using the information on this business card, list the following for the owner:
Name, company name, phone number, address, and E-mail,

and output them in this format:

{
	"1005414": "Name",
	"1005415": "Company",
	"1005416": "Phone Number",
	"1005417": "Address",
	"1005418": "E-mail"
}
Note: The numbers in the Prompt above (such as "1005414") refer to the field ID within the Ragic sheet. Please fill in the required values based on the ID of each field in your sheet.
Additionally, to minimize the chance of the AI creating extra symbols or information we don't need, you can click "Add Option" below and add the following System Message to the AI Agent:
**IMPORTANT**:The response should only include the content between { and }, do not include any kind of notes or control characters such like "```" or "json". If any information is not able to be find in the image, simply output as "null".
Once you have finished configuring the AI Agent, you can save this node.
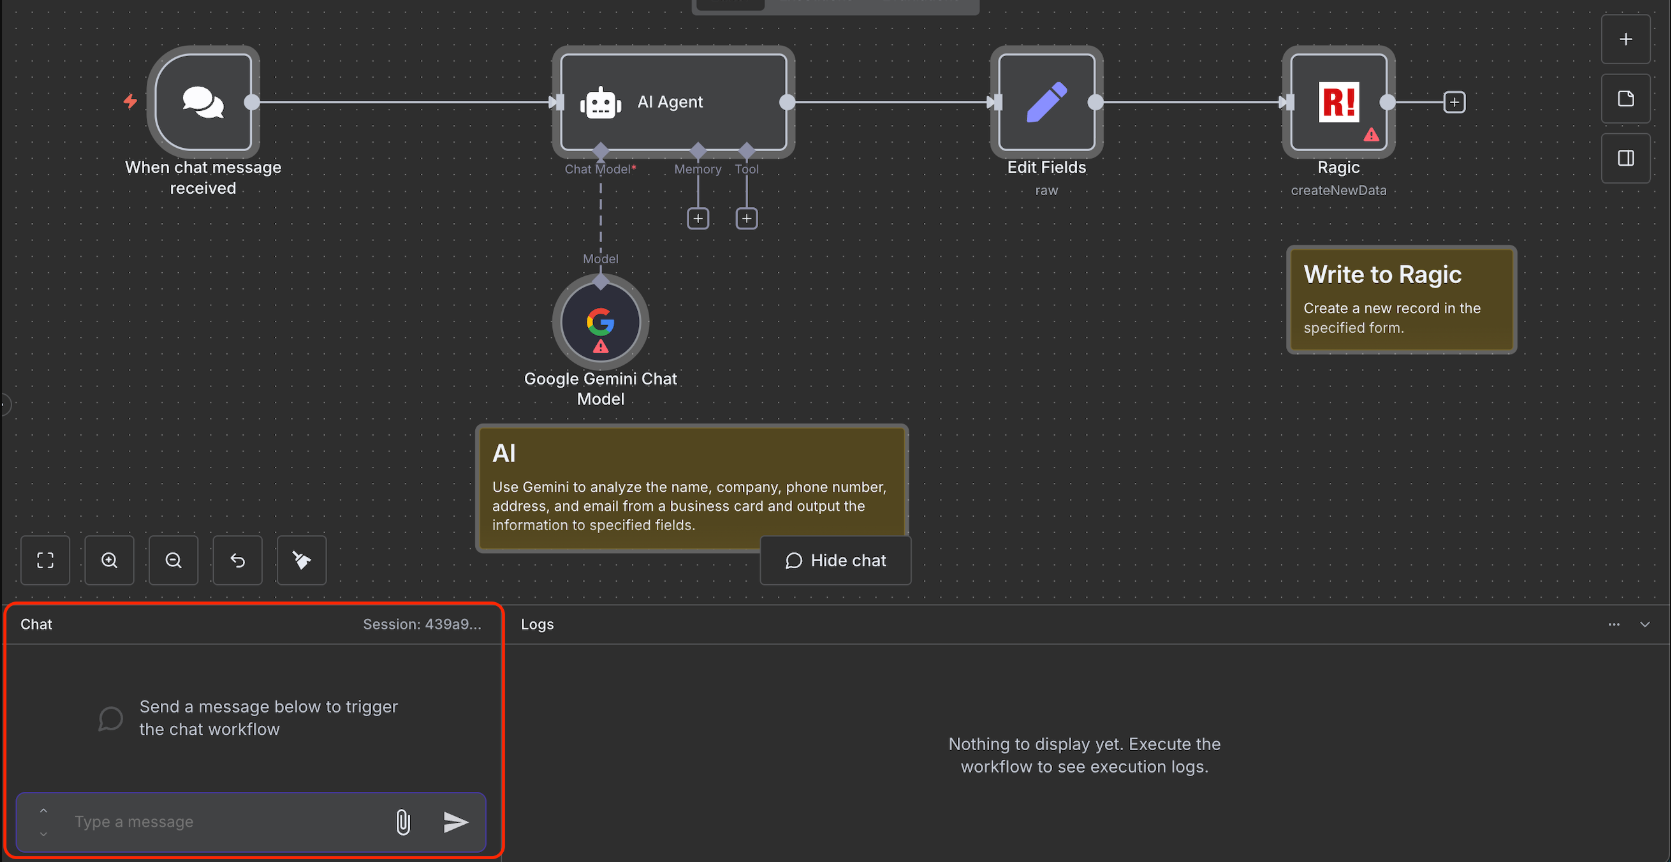
After completing the above settings, open "Chat" at the bottom left of n8n, add a description and image, and send it to trigger the AI Agent before proceeding to Step 4.
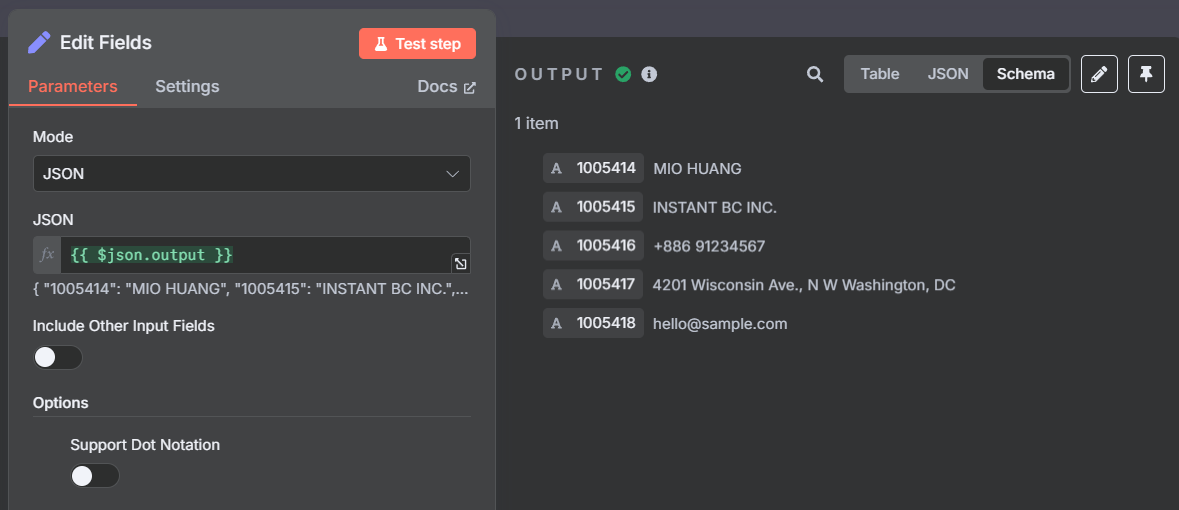
We previously used a prompt to ask the AI to output in our desired format. However, there is a higher level of uncertainty with the created output, such as noise or annotations like "```json". To handle this, we can add an "Edit Fields" action node to help us format the AI's output into what we need.
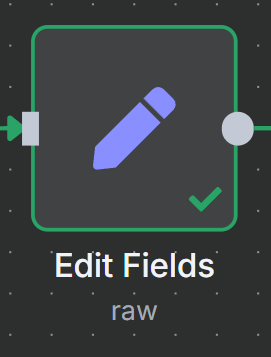
You can simply drag the output from the AI directly into the node settings to output this entire string according to the fields.
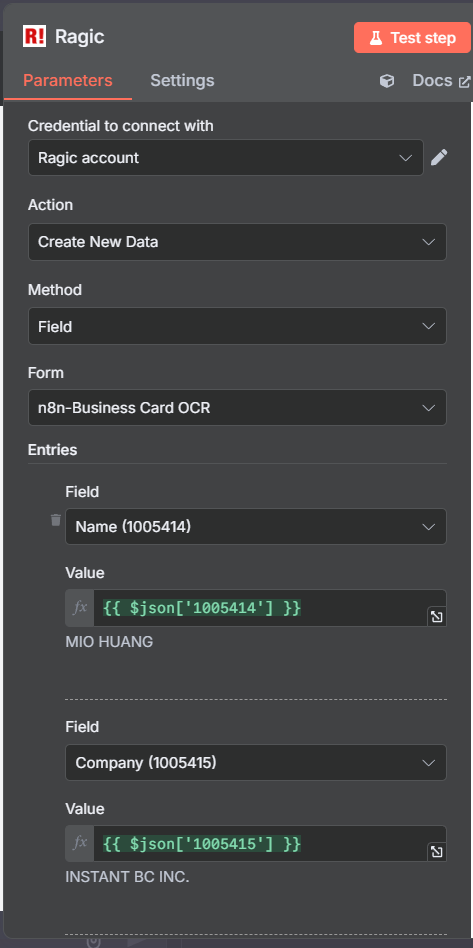
After completing the steps above, you can add a Ragic action node to create new data. We have already used "Edit Fields" to separate the content by field, so you only need to add a new credential, link your account, select your sheet, and change the Method to “Field” (select field and fill in the data). Once completed, you will be able to fill in the desired data!
Finally, you can test this workflow: Open the chat in n8n, attach an image, and ask the AI to help analyze the business card.
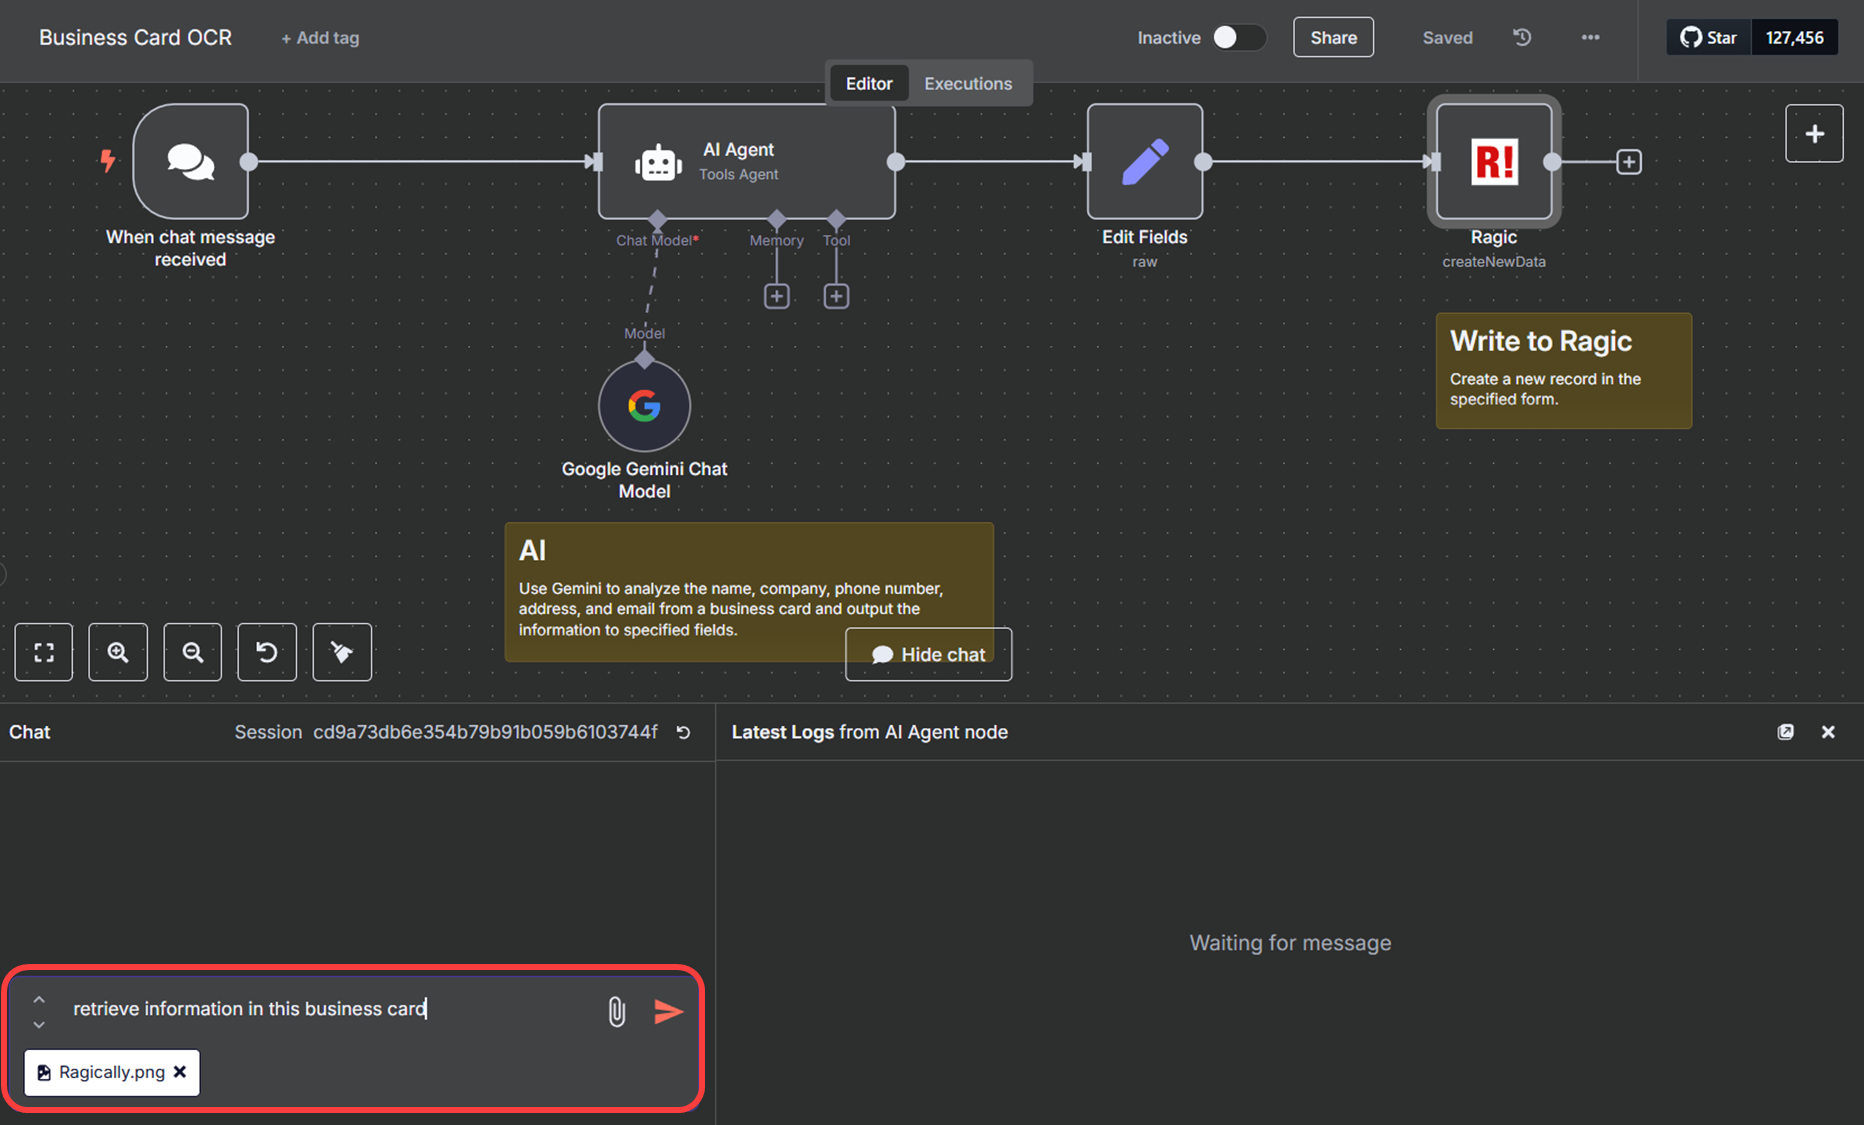
After the AI processes the card and transmits the data to Ragic for filing, the chat will display the processing steps and results:
You can then go back to the Ragic sheet to check the results!
 Thank you for your valuable feedback!
